NAVIGATION BAR

Showing posts with label How To Root HTC Sensation XL. Show all posts

Friday 15 June 2012

HOW TO ROOT HTC ARIA


HTC Aria Rooting Guide


This was orginally posted on XDA-Developers by gtg465x with credit also to eugene373 and attn1:
Prerequisites...

Note: If you're in Linux, you only need to do Step 4, Step 6, and Step 7.

Step 0.
Download and install HTC Sync: http://www.htc.com/us/support/aria-att/downloads/

Step 1.
Download and unzip the Android SDK: http://developer.android.com/sdk/index.html

Step 2.
Go into the folder where you unzipped the Android SDK and open "SDK Setup.exe".
If you aren't greeted with a failed to fetch URL error, proceed to Step 3. If you did receive this error, go to Settings in the "Choose Packages to Install" window and check "Force https;//... sources to be fetched using http://..."
Close and re-open "SDK Setup.exe".

Step 3.
When the "Choose Packages to Install" window pops up, make sure the package "Usb Driver package, revision x" is checked. You can uncheck everything else. Click Install. After it downloads and installs, close "Android SDK and AVD Manager".

Step 4.
With your device unplugged from your computer, go to Settings > Application > Development on your device and turn on USB Debugging.

Step 5.
Now plug your device in to your computer. This is just to make sure the USB drivers are installed.
Once they are installed, unplug your device and turn it off.

Step 6.
This step is optional, but it may prevent an error later on in the process. If you've never formatted your SD card from a computer, remove it from the phone and format it in Windows or OSX with an external card reader. Then place the formatted card back in your phone, but leave the phone off.

Step 7.
Download the updated Root.zip from eugene373's guide: Root the Slide & Other HTC Devices*6/15/2010* How-To Updated 6/29/2010


Now let's get started...

Step 0.
Unzip Root.zip

Step 1.
Place the contents ("update.zip", "ota.zip", and "loop") into the Android SDK tools folder.

Step 2.
Open Command Prompt or Terminal and CD to the SDK tools directory.

Step 3.
Power on your device into the bootloader by holding the "Volume Down" key and simultaneously pressing Power.
Once you're in the bootloader, wait about 30 seconds until some diagnostic checking is done.
Press "Volume Down" to highlight Recovery, but do not push Power to execute just yet.

Step 4.
Now run your loop file from the prompt (either type "loop" in Windows or "./loop.sh" in Linux) (refer to ice3186's post for Mac instructions)
Note: The loop does nothing but show you the connection status of your phone. It's not technically required, but we'll use it in this guide.

Step 5.
Once the loop is running in your prompt, get ready to connect the phone to the computer with the USB cable, but don't connect one end quite yet. With Recovery still highlighted on your phone, you will need to push the Power button and then immediately plug in the other end of the USB cord.

Step 6.
After a few seconds, you should see your device listed in the loop.

Step 7.
Unplug the USB cable from the bottom of your phone and plug it back in. You probably don't need to do this, but let's be safe. Wait for your device to show up in the loop again. Hit CTRL-C to terminate the loop.

Step 8.
You should see a triangle/exclaimation over a phone graphic.
Hold the "Volume Up" key (note it's Volume UP this time) and simultaneously press Power.
After the menu comes up, use the volume and power buttons to select and run update.zip. (This will fail, but we already know that! Select it anyway.)

Step 9.
Paste the following command into your prompt and press Enter.
adb push ota.zip /sdcard/update.zip (*OSX users add a ./ in front of all terminal commands please)

Step 10.
This is very important!! Have this next command ready in your prompt before running update.zip again!!
This is the command. Paste it into your prompt, but DO NOT press Enter yet.
adb push update.zip /sdcard

Step 11.
Run update.zip and as soon as you see a faint progress bar appear behind the text at the bottom of the screen, push Enter to execute the command in your prompt.

Step 12.
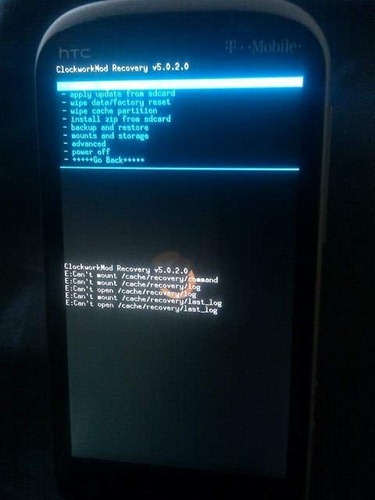
If successful, you should see Clockwork Recovery and you now have Su and Superuser.apk installed! You can now reboot your phone into the OS to verify. If unsuccessful, repeat steps 11 and 12.

Step 13.
This step is optional, but it will save you the pain of going through all of these steps again in the future. 
Unrevoked team: Recovery reflash tool (updated - Now for Aria/Liberty!)

Thursday 7 June 2012

HOW TO ROOT HTC Thunderbolt


... How To Root Your Verizon HTC Thunderbolt ...


INFORMATION:
INDEX OF THIS THREAD
Post #1: Revolutionary Toolkit for rooting - You're Here
Post #2: How to root WITHOUT downgrading - Go Here 
Post #3: How to root WITH downgrading - Go Here 
Post #4: How to unroot and return to stock - Go Here


NOTE:
The minor OTA to firmware number 2.11.605.9 patches the exploit used by Revolutionary. 
So, before you can use the Revolutionary Toolkit below... you must either do option #1 or option #2 before using Revolutionary.


There are 2 options:
#1 Achieve temp root via another means, then run Revolutionary. (Info in Post #2)
OR
#2 Several users have reported being able to downgrade to 2.11.605.5 simply by running an RUU for that firmware, despite an s-on hboot wich would normally prevent you from going backwards in version numbers. (Info in Post #3)


Feel free to do whichever is most comfortable  


Revolutionary
A new method has just become available that does not wipe your data. This is 100% the best and most recommended way to root your Thunderbolt at this time.
WARNING: GAINING S-OFF ACCESS ON THE HTC THUNDERBOLT WILL VOID THE WARRANTY.
As with any ROM or modification the usual disclaimer applies.... You are using this at your own risk!


This is, LITERALLY, less than a 5 minute process, assuming you have all the files/preliminary stuff done first. Having to do "all" the preliminary should take you another couple minutes, at most... This is THAT simple!


Information you need to have first:


1) Serial number of your cell phone
2) HBOOT version number
3) HTC FastBoot drivers
4) Super User file: superuser 3.07.zip
-----------------------------------------------------------------------


5) Uninstall HTC Sync drivers (or any other auto-sync programs you may have on your computer; you may just need to turn them "off"; I don't know.)


6) Set phone to USB Debugging on, and Always awake


To get into HBOOT, turn your phone off. Then press the volume down button along with the power button. Press and hold, and within 5 seconds it'll come on. This method supports versions 1.04.0000 and 1.05.0000.


Step-by-step Revolutionary rooting instructions:


Step 1) Install HTC FastBoot driver


Step 2) Go to REVOLUTIONARY and follow the instructions to download the file revolutionary-0.4pre3.zip. It will require you to know your cell phone's serial number, and what version of HBOOT you have.


Step 3) Plug your phone in, select "usb storage", and copy the Super User file to the SDCard somewhere (easiest if you don't put it into a folder on your SD card.) Don't unzip it. 


Step 4) Plug in your phone, and when the prompt comes up, set to "Charge Only". Disregard any notices and don't install any additional drivers or whatnot.


Step 5) Unzip the Revolutionary zip file into a folder somewhere you can find it.


Step 6) Run the file "revolutionary.exe".


Step 7) Follow the prompts on the screen. It's pretty straightforward. It will reboot to HBOOT a couple times, the last time you'll see it at the top saying "S-Off".


Step 8) It asks you if you want to install clockwork recovery. Select "Y". You'll need this...


You now have a permanent custom recovery on your phone.


Now to actually Root it:


Step 9) From the HBOOT, scroll down to "Bootloader" using the volume keys, and select using the power button. Then scroll/select "Recovery" Yes, it seems sluggish...that's fine. Don't be impatient; it'll let you scroll at some point...


Step 10) Wait! You'll see the HTC spash screen for a bit, and then eventually you'll be into Clockwork Recovery


Step 11) Scroll to "install zip from sdcard" and select.


Step 12) Scroll to "choose zip from sdcard"


Step 13) Find the super user file (superuser-3.zip) (it'll be at the bottom of the directory list if you put it in the base directory of the sd card) and select it.


Step 14) Sit back and watch the quick show... If all goes well, it will install and show you when it's finished.


Step 15) Reboot the phone (keep selecting "back" until you have the option to reboot the phone)


If you are getting Force Closes from Superuser after you are finished, please reboot into Clockwork Recovery and FIX PERMISSIONS. 

YOU'RE NOW ROOTED!!! On a STOCK ROM! No loss of data. No re-setup. Nothing... 

Tuesday 5 June 2012

Root HTC Amaze 4G On Android 2.3.4 Gingerbread Permanently With ‘One Click Root

Root HTC Amaze 4G On Android 2.3.4 


Gingerbread Permanently With ‘One Click 


Root


VIDEO TUTORIALS


Good news, folks! The critically acclaimed HTC Amaze 4G can now be rooted! If you’ve got one and want to be able to install root-only apps like Titanium Backup, then follow our guide after the jump!
2011102114084430
The root tool comes from developer xboarder56 over on popular forum for Android hacking / development XDA-Developers.
From XDA:
Hi,
guys this is a One Click Perm Root tool and its verified working. Even after reboot no more bricks like the old one Crack eyes made. It will root your phoneand it will stay rooted after multipule (sic) reboots. Enjoy.
How To Root HTC Amaze 4G With One Click Permanent Root Tool
DISCLAIMER: Redmond Pie is not to be held responsible for any loss of data as a result of the malfunctioning of your HTC Amaze 4G in the following of this guide. Follow at your own risk.
Note: This root will be permanent or temporary based on the state of your bootloader. If it is locked, the root will be temporary and you will have to re-root every time you restart your device. However, if it has been unlocked, root will be permanent. You can follow this guide on XDA to unlock your bootloader.
Alright, so before we get down to it, we suggest you download these files beforehand so that the actual rooting process can be done quickly.
Although the process shouldn’t take more than 5 minutes to complete, be sure to ensure that your HTC Amaze 4G has enough charge to last through the rooting process. If your device runsout of battery during rooting, there is a chance that you might brick it.
Step 1: Install HTC Drivers on your computer so that One Click Perm Root can detect your HTC Amaze 4G properly.
Step 2: Connect your device to your computer through USB.
Step 3: Enable USB Debugging on your HTC Amaze 4G from Settings > Applications > Development.
Step 4: Extract Zerg_Root_OneClick.zip (which you downloaded before Step 1) to C:\ and launch ZergRushTempRoot.bat
Step 5: Your HTC Amaze 4G will now be rooted. The process will take up to 3 minutes.
Step 6: Reboot your device.
uploadfromtaptalk1319036602622
If you need help or have any queries, visit the official thread on XDA-Developers.

Monday 4 June 2012

How To Root HTC Sensation XL


How To Root HTC Sensation XL


*** unlocking bootloader from HTCDEV site is highly recommended for a permanent root solution***
1. enable usb debugging from settings - applications - development
2. plug phone to pc via usb cable - charge only
3. open extracted zip folder and click runme. thats all. (if experience any daemon hanging problems pls install htc sync and plug in phone so drivers are installed. once done delete htc sync and repeat root procedure)
PC will open a cmd screen with prompts that you need to follow. app does rest
4. After root is complete pls visit market and update SU app. once done root will be fully functional and eliminate any future FCs
5. Also as an extra tip you can install SU UPDATE fixer from market to update your binaries to 3.0

ALL DONE
***************** this isnt my work and i take no credit for it. i tried it and the results were good so i am sharing it. period*****************

****please see anzhi thread for clockwork mod and chinese boot.img and rom needed prior to flashing cappy's rcmix3d rom. files needed are posted by me in his rom thread!****

Update:
Software version 1.24.709.2 doesn't seem to be rootable via this method. Please try flashing another ruu from runnymede rom thread then attempt root again

28/3/2012
Added V4 of the Doomlord Exploit as may be why XL was rooted without bootloader being unlocked.

well i relocked my bootloader and flashed ruu 1.05.404 then I used Doolord V4 to root my phone. This was succesful in permanently rooting my phone without unlocking my bootloader. This was not possible with V2 so if anyone wants to root without unlocking bootloader this is now possible using V4 of the Doomlord Exploit attached below. PLEASE NOTE THAT STILL NEED TO UNLOCK BOOTLOADER TO FLASH CUSTOM ROMS AND RECOVERY